#!/bin/bash

files="img-1*"
start=1
rename=1
echo $count

for i in `ls $files`
do
  echo $i
  rename=$(($start * 2 - 1))
  #rename=$(($start * 2))
  start=$(($start + 1))
  echo $rename
  refilename=`printf "%02u" $rename`
  mv $i $refilename.tif

done
2019年11月10日 星期日
bash shell 批次更改圖片檔名範例

2019年10月14日 星期一
第11屆iT邦幫忙鐵人賽-參考 Python 程式交易 30 天新手入門系列範例
可能需要預先安裝下列 Python Packages:
參考「第11屆iT邦幫忙鐵人賽-參考 Python 程式交易 30 天新手入門系列」系列範例修改,並存成檔名 getTaxies.py:
#
pip install js2py
pip install loguru
pip install pandas
pip install plotly
pip install pyquery
參考「第11屆iT邦幫忙鐵人賽-參考 Python 程式交易 30 天新手入門系列」系列範例修改,並存成檔名 getTaxies.py:
import csv
import datetime
import fractions
import json
import os
import random
import re
import time
import urllib.parse
import argparse

from random import randint
from time import sleep

import js2py
import loguru
import pandas
import plotly.graph_objects
import pyquery
import requests
import requests.exceptions

now = datetime.datetime.now()
proxies = []

proxy = None

class Taiex:
    def __init__(self, date, openPrice, highestPrice, lowestPrice, closePrice):
        # 日期
        self.Date = date
        # 開盤價
        self.OpenPrice = openPrice
        # 最高價
        self.HighestPrice = highestPrice
        # 最低價
        self.LowestPrice = lowestPrice
        # 收盤價
        self.ClosePrice = closePrice
    # 物件表達式
    def __repr__(self):
        return f'class Taiex {{ Date={self.Date}, OpenPrice={self.OpenPrice}, HighestPrice={self.HighestPrice}, LowestPrice={self.LowestPrice}, ClosePrice={self.ClosePrice} }}'

def getProxy():
    global proxies
    if len(proxies) == 0:
        getProxies()
    proxy = random.choice(proxies)
    loguru.logger.debug(f'getProxy: {proxy}')
    proxies.remove(proxy)
    loguru.logger.debug(f'getProxy: {len(proxies)} proxies is unused.')
    return proxy

def reqProxies(hour):
    global proxies
    proxies = proxies + getProxiesFromProxyNova()
    proxies = proxies + getProxiesFromGatherProxy()
    proxies = proxies + getProxiesFromFreeProxyList()
    proxies = list(dict.fromkeys(proxies))
    loguru.logger.debug(f'reqProxies: {len(proxies)} proxies is found.')

def getProxies():
    global proxies
    hour = f'{now:%Y%m%d%H}'
    filename = f'proxies-{hour}.csv'
    filepath = f'{filename}'
    if os.path.isfile(filepath):
        loguru.logger.info(f'getProxies: {filename} exists.')
        loguru.logger.warning(f'getProxies: {filename} is loading...')
        with open(filepath, 'r', newline='', encoding='utf-8-sig') as f:
            reader = csv.DictReader(f)
            for row in reader:
                proxy = row['Proxy']
                proxies.append(proxy)
        loguru.logger.success(f'getProxies: {filename} is loaded.')
    else:
        loguru.logger.info(f'getProxies: {filename} does not exist.')
        reqProxies(hour)
        loguru.logger.warning(f'getProxies: {filename} is saving...')
        with open(filepath, 'w', newline='', encoding='utf-8-sig') as f:
            writer = csv.writer(f)
            writer.writerow([
                'Proxy'
            ])
            for proxy in proxies:
                writer.writerow([
                    proxy
                ])
        loguru.logger.success(f'getProxies: {filename} is saved.')

def getProxiesFromProxyNova():
    proxies = []
    countries = [
        'tw',
        'jp',
        'kr',
        'id',
        'my',
        'th',
        'vn',
        'ph',
        'hk',
        'uk',
        'us'
    ]
    for country in countries:
        url = f'https://www.proxynova.com/proxy-server-list/country-{country}/'
        loguru.logger.debug(f'getProxiesFromProxyNova: {url}')
        loguru.logger.warning(f'getProxiesFromProxyNova: downloading...')
        response = requests.get(url)
        if response.status_code != 200:
            loguru.logger.debug(f'getProxiesFromProxyNova: status code is not 200')
            continue
        loguru.logger.success(f'getProxiesFromProxyNova: downloaded.')
        d = pyquery.PyQuery(response.text)
        table = d('table#tbl_proxy_list')
        rows = list(table('tbody:first > tr').items())
        loguru.logger.warning(f'getProxiesFromProxyNova: scanning...')
        for row in rows:
            tds = list(row('td').items())
            if len(tds) == 1:
                continue
            js = row('td:nth-child(1) > abbr').text()
            js = 'let x = %s; x' % (js[15:-2])
            ip = js2py.eval_js(js).strip()
            port = row('td:nth-child(2)').text().strip()
            proxy = f'{ip}:{port}'
            proxies.append(proxy)
        loguru.logger.success(f'getProxiesFromProxyNova: scanned.')
        loguru.logger.debug(f'getProxiesFromProxyNova: {len(proxies)} proxies is found.')
        time.sleep(1)
    return proxies

def getProxiesFromGatherProxy():
    proxies = []
    countries = [
        'Taiwan',
        'Japan',
        'United States',
        'Thailand',
        'Vietnam',
        'Indonesia',
        'Singapore',
        'Philippines',
        'Malaysia',
        'Hong Kong'
    ]
    for country in countries:
        url = f'http://www.gatherproxy.com/proxylist/country/?c={urllib.parse.quote(country)}'
        loguru.logger.debug(f'getProxiesFromGatherProxy: {url}')
        loguru.logger.warning(f'getProxiesFromGatherProxy: downloading...')
        response = requests.get(url)
        if response.status_code != 200:
            loguru.logger.debug(f'getProxiesFromGatherProxy: status code is not 200')
            continue
        loguru.logger.success(f'getProxiesFromGatherProxy: downloaded.')
        d = pyquery.PyQuery(response.text)
        scripts = list(d('table#tblproxy > script').items())
        loguru.logger.warning(f'getProxiesFromGatherProxy: scanning...')
        for script in scripts:
            script = script.text().strip()
            script = re.sub(r'^gp\.insertPrx\(', '', script)
            script = re.sub(r'\);$', '', script)
            script = json.loads(script)
            ip = script['PROXY_IP'].strip()
            port = int(script['PROXY_PORT'].strip(), 16)
            proxy = f'{ip}:{port}'
            proxies.append(proxy)
        loguru.logger.success(f'getProxiesFromGatherProxy: scanned.')
        loguru.logger.debug(f'getProxiesFromGatherProxy: {len(proxies)} proxies is found.')
        time.sleep(1)
    return proxies

def getProxiesFromFreeProxyList():
    proxies = []
    url = 'https://free-proxy-list.net/'
    loguru.logger.debug(f'getProxiesFromFreeProxyList: {url}')
    loguru.logger.warning(f'getProxiesFromFreeProxyList: downloading...')
    response = requests.get(url)
    if response.status_code != 200:
        loguru.logger.debug(f'getProxiesFromFreeProxyList: status code is not 200')
        return
    loguru.logger.success(f'getProxiesFromFreeProxyList: downloaded.')
    d = pyquery.PyQuery(response.text)
    trs = list(d('table#proxylisttable > tbody > tr').items())
    loguru.logger.warning(f'getProxiesFromFreeProxyList: scanning...')
    for tr in trs:
        tds = list(tr('td').items())
        ip = tds[0].text().strip()
        port = tds[1].text().strip()
        proxy = f'{ip}:{port}'
        proxies.append(proxy)
    loguru.logger.success(f'getProxiesFromFreeProxyList: scanned.')
    loguru.logger.debug(f'getProxiesFromFreeProxyList: {len(proxies)} proxies is found.')
    return proxies

# 取得指定年月內每交易日的盤後資訊
def getTaiexs(year, month):
    global proxy
    taiexs = []
    while True:
        if proxy is None:
            proxy = getProxy()
        url = f'https://www.twse.com.tw/indicesReport/MI_5MINS_HIST?response=json&date={year}{month:02}01'
        loguru.logger.info(f'getTaiexs: month {month} url is {url}')
        loguru.logger.warning(f'getTaiexs: month {month} is downloading...')
        try:
            response = requests.get(
                url,
                proxies={
                    'https': f'https://{proxy}'
                },
                timeout=3
            )
            if response.status_code != 200:
                loguru.logger.success(f'getTaiexs: month {month} status code is not 200.')
                proxy = None
                break
            loguru.logger.success(f'getTaiexs: month {month} is downloaded.')
            body = response.json()
            stat = body['stat']
            if stat != 'OK':
                loguru.logger.error(f'getTaiexs: month {month} responses with error({stat}).')
                break
            records = body['data']
            if len(records) == 0:
                loguru.logger.success(f'getTaiexs: month {month} has no data.')
                break
            for record in records:
                date = record[0].strip()
                parts = date.split('/')
                y = int(parts[0]) + 1911
                m = int(parts[1])
                d = int(parts[2])
                date = f'{y}{m:02d}{d:02d}'
                openPrice = record[1].replace(',', '').strip()
                highestPrice = record[2].replace(',', '').strip()
                lowestPrice = record[3].replace(',', '').strip()
                closePrice = record[4].replace(',', '').strip()
                taiex = Taiex(
                    date=date,
                    openPrice=openPrice,
                    highestPrice=highestPrice,
                    lowestPrice=lowestPrice,
                    closePrice=closePrice
                )
                taiexs.append(taiex)
        except requests.exceptions.ConnectionError:
            loguru.logger.error(f'getTaiexs: proxy({proxy}) is not working (connection error).')
            proxy = None
            continue
        except requests.exceptions.ConnectTimeout:
            loguru.logger.error(f'getTaiexs: proxy({proxy}) is not working (connect timeout).')
            proxy = None
            continue
        except requests.exceptions.ProxyError:
            loguru.logger.error(f'getTaiexs: proxy({proxy}) is not working (proxy error).')
            proxy = None
            continue
        except requests.exceptions.SSLError:
            loguru.logger.error(f'getTaiexs: proxy({proxy}) is not working (ssl error).')
            proxy = None
            continue
        except Exception as e:
            loguru.logger.error(f'getTaiexs: proxy({proxy}) is not working.')
            loguru.logger.error(e)
            proxy = None
            continue
        break
    return taiexs

# 儲存傳入的盤後資訊
def saveTaiexs(filepath, taiexs):
    loguru.logger.info(f'saveTaiexs: {len(taiexs)} taiexs.')
    loguru.logger.warning(f'saveTaiexs: {filepath} is saving...')
    with open(filepath, mode='w', newline='', encoding='utf-8-sig') as f:
        writer = csv.writer(f)
        writer.writerow([
            'Date',
            'OpenPrice',
            'HighestPrice',
            'LowestPrice',
            'ClosePrice'
        ])
        for taiex in taiexs:
            writer.writerow([
                taiex.Date,
                taiex.OpenPrice,
                taiex.HighestPrice,
                taiex.LowestPrice,
                taiex.ClosePrice
            ])
    loguru.logger.success(f'main: {filepath} is saved.')

def main(args):
    taiexs = []
    thisYear = 2019
    if args.year:
        loguru.logger.info(f'[-y|--year] [value:{args.year}]')
        thisYear = int(args.year)
    else:
        loguru.logger.info(f'[-y|--year] is not used, set year in '+str(thisYear))
    # 取得從 2019.01 至 2019.12 的盤後資訊
    for month in range(1, 13):
        # 程式暫停 3~15 秒
        sleep(randint(3, 15))
        taiexs = taiexs + getTaiexs(thisYear, month)
    filepath = f'taiexs-'+str(thisYear)+'.csv'
    saveTaiexs(filepath, taiexs)

    # 使用 Pandas 讀取下載回來的紀錄檔
    df = pandas.read_csv(filepath)
    # 將 Date 欄位按照格式轉換為 datetime 資料
    df['Date'] = pandas.to_datetime(df['Date'], format='%Y%m%d')

    # 建立圖表
    figure = plotly.graph_objects.Figure(
        data=[
            # Line Chart
            # 收盤價
            plotly.graph_objects.Scatter(
                x=df['Date'],
                y=df['ClosePrice'],
                name='收盤價',
                mode='lines',
                line=plotly.graph_objects.scatter.Line(
                    color='#6B99E5'
                )
            ),
            # Candlestick Chart
            # K 棒
            plotly.graph_objects.Candlestick(
                x=df['Date'],
                open=df['OpenPrice'],
                high=df['HighestPrice'],
                low=df['LowestPrice'],
                close=df['ClosePrice'],
                name='盤後資訊',
            )
        ],
        # 設定 XY 顯示格式
        layout=plotly.graph_objects.Layout(
            xaxis=plotly.graph_objects.layout.XAxis(
                tickformat='%Y-%m'
            ),
            yaxis=plotly.graph_objects.layout.YAxis(
                tickformat='.2f'
            )
        )
    )
    figure.show()

if __name__ == '__main__':
    parser = argparse.ArgumentParser()

    # -y [value:yyyy]
    # -- year [value:yyyy]
    parser.add_argument(
        '-y',
        '--year',
        help='set year in yyyy format',
        type=int
    )

    args = parser.parse_args()

    loguru.logger.add(
        f'{datetime.date.today():%Y%m%d}.log',
        rotation='1 day',
        retention='7 days',
        level='DEBUG'
    )
    main(args)
範例以2007年為例,執行下列:
python getTaxies.py -y 2007執行結果:
python getTaixes.py -y 2007
2019-10-14 03:34:40.292 | INFO     | __main__:main:300 - [-y|--year] [value:2007]
2019-10-14 03:34:44.294 | INFO     | __main__:getProxies:69 - getProxies: proxies-2019101403.csv exists.
2019-10-14 03:34:44.298 | WARNING  | __main__:getProxies:70 - getProxies: proxies-2019101403.csv is loading...
2019-10-14 03:34:44.308 | SUCCESS  | __main__:getProxies:76 - getProxies: proxies-2019101403.csv is loaded.
2019-10-14 03:34:44.313 | DEBUG    | __main__:getProxy:50 - getProxy: 180.250.216.242:3128
2019-10-14 03:34:44.317 | DEBUG    | __main__:getProxy:52 - getProxy: 724 proxies is unused.
2019-10-14 03:34:44.322 | INFO     | __main__:getTaiexs:206 - getTaiexs: month 1 url is https://www.twse.com.tw/indicesReport/MI_5MINS_HIST?response=json&date=20070101
...(略)...
2019-10-14 03:36:58.484 | INFO     | __main__:getTaiexs:206 - getTaiexs: month 12 url is https://www.twse.com.tw/indicesReport/MI_5MINS_HIST?response=json&date=20071201
2019-10-14 03:36:58.489 | WARNING  | __main__:getTaiexs:207 - getTaiexs: month 12 is downloading...
2019-10-14 03:36:58.846 | SUCCESS  | __main__:getTaiexs:220 - getTaiexs: month 12 is downloaded.
2019-10-14 03:36:58.850 | INFO     | __main__:saveTaiexs:275 - saveTaiexs: 247 taiexs.
2019-10-14 03:36:58.853 | WARNING  | __main__:saveTaiexs:276 - saveTaiexs: taiexs-2007.csv is saving...
2019-10-14 03:36:58.864 | SUCCESS  | __main__:saveTaiexs:294 - main: taiexs-2007.csv is saved.
 |
| 2007年大盤指數 |
#
2019年4月30日 星期二
python 抓取上市及上櫃公司清單, 並寫入 MySQL 資料庫
不囉嗦,直接看程式碼:
# 如何獲得上市上櫃股票清單
import requests
import time
import pandas as pd
from sqlalchemy import create_engine
from sqlalchemy.types import NVARCHAR, Date

def getTWSE(str_mode):
     # 設定爬蟲程式的 User_Agent
    headers = {'user-agent': 'Mozilla/5.0 (Macintosh Intel Mac OS X 10_13_4) AppleWebKit/537.36 (KHTML, like Gecko) Chrome/66.0.3359.181 Safari/537.36'}
    # 上市: http://isin.twse.com.tw/isin/C_public.jsp?strMode=2
    # 上櫃: http://isin.twse.com.tw/isin/C_public.jsp?strMode=4
    req_url = "http://isin.twse.com.tw/isin/C_public.jsp?strMode=%s" % (str_mode)
    res = requests.get(req_url, headers=headers)
    df = pd.read_html(res.text)[0]

    # 設定column名稱
    df.columns = df.iloc[0]
    # 刪除第一行
    df = df.iloc[1:]
    # 先移除row,再移除column,超過三個NaN則移除
    df = df.dropna(thresh=3, axis=0).dropna(thresh=3, axis=1)
    df[['有價證券代號','名稱']] = df['有價證券代號及名稱'].str.split(n=1, expand=True)
    del df['有價證券代號及名稱']
    df = df.set_index('有價證券代號')
    return df

engine = create_engine("mysql+pymysql://stockuser:password@127.0.0.1:3306/stockdb")

dtypedict = {
    '有價證券代號':NVARCHAR(length=32),
    '上市日': Date()
}

# 抓取上市公司股票清單, 寫入MySQL > stockdb > listed_code (listed_code table存在時整個取代)
listed_companies = "2"  #上市公司
mydf1 = getTWSE(listed_companies)
mydf1.to_sql(name="listed_code", con=engine, if_exists = 'replace', index=True, dtype=dtypedict)

# 先睡個10秒鐘吧
time.sleep(10)

# 抓取上櫃公司股票清單, 寫入MySQL > stockdb > listed_code (append 到 listed_code table)
listed_companies = "4" #上櫃公司
mydf2 = getTWSE(listed_companies)
mydf2.to_sql(name="listed_code", con=engine, if_exists = 'append', index=True, dtype=dtypedict)
2017年12月12日 星期二
Windows 10 64bits + Arduino IDE + ESP8266 (ESP-01)
- 至 Arduino.cc 下載最新版 Arduino IDE (以1.8.5版為例)
- 將 arduino-1.8.5-windows.zip 解壓縮至指定目錄下,安裝好 Arduino IDE
- 啟動 Arduino IDE,開啟「檔案 > 偏好設定 (preferences)」 視窗
- 在「額外的開發版管理員網址」(Additional Board Manager) 輸入網址:
- http://arduino.esp8266.com/stable/package_esp8266com_index.json
- 開啟「工具 (Tools) > 開發板 (Board) > 開發板管理員 (Boards Manager)」後,搜尋 "esp" 並且安裝 esp8266 套件

安裝 esp8266 (可以看見其實有錯誤發生)

正常的套件下載安裝畫面 - 安裝完成後,下次就能選擇 ESP8266 開發板,進行IDE程式開發與上傳功能
 |
| 偏好設定 |
 |
| 新增 esp8266 套件網址 |


後記:
- 如果下載時發生了"下載http://downloads.arduino.cc/packages/package_index.jsp時發生錯誤"的訊息,可以在「檔案 > 偏好設定 > 網路」設定 proxy 來解決。
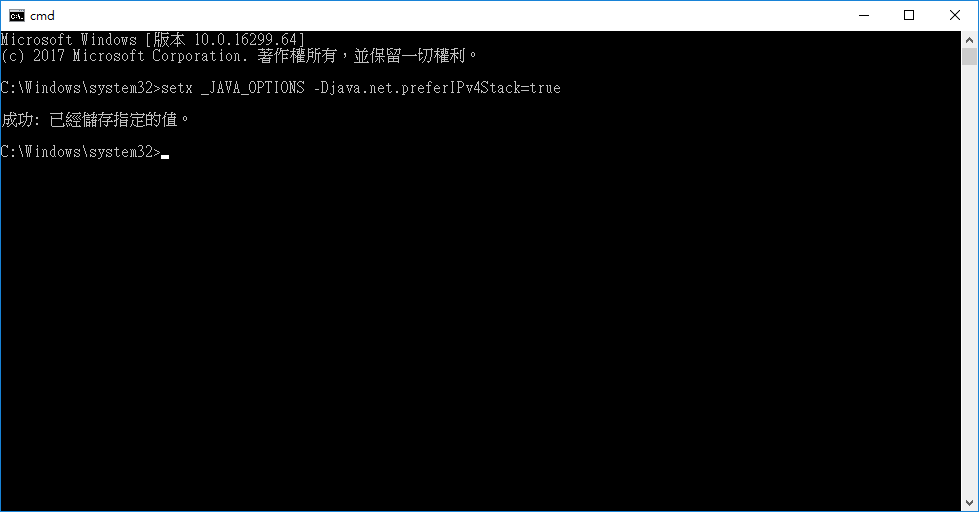
- 網路上有些說法是設定 JAVA IPv4Stack=true 即可: setx _JAVA_OPTIONS -Djava.net.preferIPv4Stack=true
- 不過對我來說似乎沒有用,反而是最簡單的 proxy 解決了我的問題。
-

下載套件時的錯誤訊息
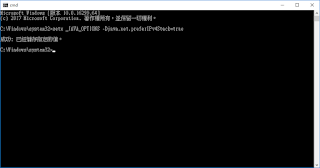
設定 Java IPv4Stack ,不過對我來說沒用處

設定 proxy


2017年2月20日 星期一
取得政府資料開放平台資料資源,將資料分類統計以R語言繪製成圓餅圖
library(data.table)

# 取得政府資料開放平台資料資源 (file format = csv)
data <- fread("http://search.data.gov.tw/wise/query?q=%2A%3A%2A&export=true&format=csv&rows=2147483647&d=1", header="auto", encoding = "UTF-8")

# 統計資料分類及分類數量, 統計結果以 data.frame 儲存至 categories
categories <- as.data.frame(table(data$服務分類))

# 計算每個分類百分比,取小數點第2位,將結果存於 pct
pct <- round(categories$Freq/sum(categories$Freq)*100,2)

# 把原來的分類"名稱 百分比 %" 存回原來的名類名稱中
categories$Var1 <- paste(categories$Var1, pct, "%", sep=" ")

#繪製圓餅圖 Piechart
pie(categories$Freq, labels=categories$Var1, main="政府資料開放平台資料資源", col=rainbow(length(categories$Var1)))
執行結果:

2016年12月30日 星期五
Python爬蟲抓取台灣銀行的牌告匯率
參考來源:大數軟體有限公司 [爬蟲實戰] 如何撰寫Python爬蟲抓取台灣銀行的牌告匯率?
來源:https://www.youtube.com/watch?v=-c5rrzjsN34
程式碼範例:
執行結果:
來源:https://www.youtube.com/watch?v=-c5rrzjsN34
程式碼範例:
import pandas
dfs = pandas.read_html('http://rate.bot.com.tw/xrt?Lang=zh-TW')
currency = dfs[0]
currency = currency.ix[:,0:5]
currency.columns = [u'幣別',u'現金匯率-本行買入',u'現金匯率-本行賣出',u'即期匯率-本行買入',u'即期匯率-本行賣出']
currency[u'幣別'] = currency[u'幣別'].str.extract('\((\w+)\)')
print(currency)
currency.to_excel('currency.xlsx')
執行結果:
     幣別 現金匯率-本行買入 現金匯率-本行賣出 即期匯率-本行買入 即期匯率-本行賣出
0   USD      31.9    32.442      32.2      32.3
1   HKD     4.008     4.203     4.128     4.188
2   GBP     38.53     40.46      39.4     39.82
3   AUD     22.98     23.64     23.17      23.4
4   CAD     23.53     24.27      23.8     24.02
5   SGD     21.78     22.56      22.2     22.38
6   CHF     30.85     31.91     31.38     31.67
7   JPY    0.2672    0.2782    0.2736    0.2776
8   ZAR         -         -      2.32       2.4
9   SEK      3.15      3.66      3.49      3.59
10  NZD     22.06     22.69      22.3      22.5
11  THB    0.7965    0.9395     0.885     0.925
12  PHP    0.6019    0.7349         -         -
13  IDR   0.00208   0.00278         -         -
14  EUR      33.2     34.35      33.7      34.1
15  KRW   0.02506   0.02896         -         -
16  VND   0.00104   0.00154         -         -
17  MYR     6.105     7.705         -         -
18  CNY      4.52     4.682     4.592     4.642
2016年10月3日 星期一
遇到 JavaScript 網頁的爬蟲程式怎麼取得網頁內容
有些網頁利用JavaScript動態自後端取得資料後才在網頁呈現,單純的爬蟲程式遇到這個情況,該怎麼辦呢?
可以試試看自動化測試軟體 selenium 和 PhantomJS 來模擬瀏覽器瀏覽,取得網頁呈現的真實模樣。
使用selenium 和 PhantomJS的程式碼範例:
接下來整合 BeautifulSoup 的程式碼範例:
執行結果:
延伸閱讀:
#
可以試試看自動化測試軟體 selenium 和 PhantomJS 來模擬瀏覽器瀏覽,取得網頁呈現的真實模樣。
- 先安裝 python selenium 套件
- 下載並解壓縮 PhantomJS 軟體,檔案路徑等下python程式碼中會用上
sudo pip install selenium
使用selenium 和 PhantomJS的程式碼範例:
from selenium import webdriver

driver = webdriver.PhantomJS(executable_path='/您的PhantomJS目錄/bin/phantomjs')
# 以PChome購物搜尋 macbook 為例
driver.get('http://ecshweb.pchome.com.tw/search/v3.3/?q=macbook')
pageSource = driver.page_source
print(pageSource)
driver.close()
接下來整合 BeautifulSoup 的程式碼範例:
import requests
from bs4 import BeautifulSoup
from selenium import webdriver

url = 'http://ecshweb.pchome.com.tw/search/v3.3/?q=macbook'

driver = webdriver.PhantomJS(executable_path='/您的PhantomJS目錄/bin/phantomjs')
driver.get(url)
pageSource = driver.page_source
#print(pageSource)

soup = BeautifulSoup(pageSource, "lxml")

item_count = 1
for item in soup.select('img'):
    #print(item)
    print('['+str(item_count)+']')
    print(item['title'])
    print(item['src'])
    item_count += 1

driver.close()
執行結果:
[1]
MacBook Air 13 吋:256GB(Z0TB0001U)
http://a.ecimg.tw/pic/v1/data/item/201606/D/G/A/X/5/Y/sDGAX5Y-A9007812U000_5752453b19aff.jpg
[2]
MacBook Air 13 吋:128GB(MMGF2TA/A)
http://a.ecimg.tw/pic/v1/data/item/201605/D/G/A/X/0/7/sDGAX07-A90077H7W000_5733ebfc0a883.jpg
[3]
MacBook Pro 13 吋:2.7GHz 256GB (MF840TA/A)
http://a.ecimg.tw/pic/v1/data/item/201511/D/G/A/X/9/6/sDGAX96-A9006MBQR000_563c649e0b12b.jpg
[4]
MacBook Pro 13 吋:2.7GHz 128GB (MF839TA/A)-0160830
http://a.ecimg.tw/pic/v1/data/item/201608/D/G/A/X/7/1/sDGAX71-A9007H2EZ000_57c53b72dab2e.jpg
[5]
MacBook Pro 13 吋:2.7GHz 128GB (MF839TA/A)
http://a.ecimg.tw/pic/v1/data/item/201601/D/G/A/X/7/H/sDGAX7H-19006S5WQ000_5695c64a6dfdf.jpg
[6]
MacBook Air 13 吋:256GB(MMGG2TA/A)
http://a.ecimg.tw/pic/v1/data/item/201605/D/G/A/X/0/7/sDGAX07-A90077H97000_5733ec30bc6f2.jpg
[7]
MacBook Air 13 吋:128GB(MMGF2TA/A)
http://a.ecimg.tw/pic/v1/data/item/201609/D/G/A/X/0/7/sDGAX07-19007IBWT000_57d8cf53b058b.jpg
[8]
MacBook Air 13 吋:256GB(MMGG2TA/A)
http://a.ecimg.tw/pic/v1/data/item/201605/D/G/A/X/0/7/sDGAX07-A900799NW000_5742d25e860a6.jpg
[9]
MacBook 12 吋 256GB 玫瑰金 (MMGL2TA/A)
http://a.ecimg.tw/pic/v1/data/item/201605/D/G/A/X/4/X/sDGAX4X-A9007904G000_573d338a41048.jpg
[10]
MacBook Pro 13 吋:2.7GHz 128GB (MF839TA/A)
http://a.ecimg.tw/pic/v1/data/item/201609/D/G/A/X/7/H/sDGAX7H-19007HCAE000_57c9111d721f8.jpg
[11]
MacBook Air 13 吋:128GB(MJVE2TA/A)-0160505
http://a.ecimg.tw/pic/v1/data/item/201605/D/G/A/X/7/1/sDGAX71-A90078DVN000_5731b259475be.jpg
[12]
MacBook Air 13 吋:256GB (Z0TB0001U)
http://a.ecimg.tw/pic/v1/data/item/201606/D/G/A/X/5/Y/sDGAX5Y-A9007AD55000_5757bc01e00b8.jpg
[13]
MacBook Pro 13 吋:2.7GHz 256GB (MF840TA/A)
http://a.ecimg.tw/pic/v1/data/item/201609/D/G/A/X/7/H/sDGAX7H-19007HCA4000_57c911687f3a0.jpg
[14]
MacBook Pro 13 吋:2.5 GHz 500GB (MD101TA/A)
http://a.ecimg.tw/pic/v1/data/item/201602/D/G/A/X/3/N/sDGAX3N-19006UUHB000_56cd1e246ef7f.jpg
[15]
MacBook 12 吋 512GB 太空灰(MJY42TA/A)-0160830
http://a.ecimg.tw/pic/v1/data/item/201608/D/G/A/X/7/1/sDGAX71-A9007H2M9000_57c541fe92913.jpg
[16]
MacBook Air 13 吋:128GB(Z0TA0001B)-01600830
http://a.ecimg.tw/pic/v1/data/item/201608/D/G/A/X/7/1/sDGAX71-A9007H1FX000_57c5056a09d5c.jpg
[17]
MacBook Air 13 吋:256GB(Z0TB0001U)
http://a.ecimg.tw/pic/v1/data/item/201606/D/G/A/X/5/Y/sDGAX5Y-A90078141000_5752441944474.jpg
[18]
MacBook Pro 13 吋:2.5 GHz 500GB (MD101TA/A)
http://a.ecimg.tw/pic/v1/data/item/201409/D/G/A/X/3/N/sDGAX3N-19005FWJW000_541a90b4ee17a.jpg
[19]
MacBook Pro 15 吋: 2.8GHz 512GB 配備Retina顯示器(P/N.Z0RG0010V)
http://a.ecimg.tw/pic/v1/data/item/201605/D/G/A/X/4/Y/sDGAX4Y-A90077V5U000_572869a2c5313.jpg
[20]
MacBook Air 11 吋:128GB(MJVM2TA/A)
http://a.ecimg.tw/pic/v1/data/item/201504/D/G/A/X/0/7/sDGAX07-A90060KEB000_552b96e29b665.jpg
延伸閱讀:
#
2016年6月21日 星期二
擷取PDF檔案內容進行中文分詞
目標:擷取PDF檔案內容並進行中文分詞。
以 PDFMiner API 自PDF檔案擷取文字資料,再利用先前我們曾經使用過的jieba來進行中文分詞。
工具:
程式:
執行結果:
延伸閱讀:
參考資料:
 |
| Source : Uncalno Tekno |
工具:
export http_proxy=http://proxy.hinet.net:80
export https_proxy=http://proxy.hinet.net:80

pip install pdfminer
pip install jieba
程式:
# -*- coding: utf-8 -*-
import sys
import jieba
from cStringIO import StringIO
from pdfminer.pdfinterp import PDFResourceManager, PDFPageInterpreter
from pdfminer.converter import TextConverter
from pdfminer.layout import LAParams
from pdfminer.pdfpage import PDFPage

def convert_pdf_to_txt(path):
    rsrcmgr = PDFResourceManager()
    retstr = StringIO()
    codec = 'utf-8'
    laparams = LAParams()
    device = TextConverter(rsrcmgr, retstr, codec=codec, laparams=laparams)
    fp = file(path, 'rb')
    interpreter = PDFPageInterpreter(rsrcmgr, device)
    password = ""
    maxpages = 0
    caching = True
    pagenos=set()
    for page in PDFPage.get_pages(fp, pagenos, maxpages=maxpages, password=password,caching=caching, check_extractable=True):
        interpreter.process_page(page)
    fp.close()
    device.close()
    str = retstr.getvalue()
    retstr.close()
    return unicode(str, 'utf-8')

if __name__ == '__main__':
    if len(sys.argv) < 2:
        print 'python %s <your PDF filename>' % (sys.argv[0])
        sys.exit()
    else:
        for filename in sys.argv[1:]:
            # 載入使用者自建詞庫
            jieba.load_userdict("userdict.txt")
            # PDF檔案內容轉換為文字資料
            pdf_content = convert_pdf_to_txt(filename)
            pdf_content = pdf_content.replace('\n','').replace(' ','')
            # 對 pdf_content 進行中文分詞
            print("------開始進行中文分詞------")
            words = jieba.cut(pdf_content, cut_all=True)
            print("  Full Mode: " + "/ ".join(words))
            print("----------------------------")
            words = jieba.cut(pdf_content, cut_all=False)
            print("  Default Mode: " + "/ ".join(words))
            print("----------------------------")
            words = jieba.cut_for_search(pdf_content)
            print("  Search Engine Mode: " + ", ".join(words))
            print ''
執行結果:
$ python extractPDF.py test.pdf
Building prefix dict from the default dictionary ...
Loading model from cache /tmp/jieba.cache
Loading model cost 0.687 seconds.
Prefix dict has been built succesfully.
------開始進行中文分詞------
  Full Mode: 五大/ 支付/ App/ 最高/ 回饋/ 30/ / 行動/ 動支/ 支付/ 技術/ 有/ 許多
...
美容, 舒壓, 、, 購物, 、, 寵物, 等, 領域, ,, 在, 精選, 店家, 消費, ,, 最高, 滿千, 就, 送, 300, 元, ,, 等於, 現, 賺, 30, %, 左右, 的, 回饋, ;, 不, 指定, 店家, 也能, 有, 5, %, 的, 街口, 幣, 回饋, ,, 一塊, 街口, 幣, 可以, 抵, 消費, 1, 元, ,, 最高, 折抵, 40, %, 。, LINEPay, 主要, 以, 網路, 店家, 為主, ,, 將近, 200, 個, 品牌, 都可, 可以, 都可以, 透過, 它, 來, 支付, ,, 而, 實體, 店僅, 6, 家, 支援, ,, 其中, 包含, 美麗, 華, 百貨, 公司, 百貨公司, 。, Line, 與, 各家, 銀行, 推出, 的, 優惠, ,, 像是, 刷, 玉山, 滿, 388, 元, 就, 回饋, 50, 元, ,, 刷滿, 888, 元, 就, 回饋, 100, 元, ;, 綁定, 國泰, 世華卡, ,, 不用, 消費, 就, 送, 50, 元, 刷卡, 金, ;, 刷, 富邦, 、, 中信, 還能, 抽, LINE, 周邊, 商品, 。,
延伸閱讀:
- Python 基本爬蟲程式 + jieba 中文分詞 範例 - 以 Google 新聞為例
- Python 基本爬蟲程式 (crawler) 範例 - 以 Google 新聞為例
- 下載使用者自建詞庫 userdict.txt (補充自小麥注音輸入法詞庫)
參考資料:
- How do I use pdfminer as library (stackoverflow)
- Programming with PDFMiner (官網文件說明)
2016年1月4日 星期一
Windows 7/8 (免費)資料夾同步比對 robocopy 批次檔
前一篇才寫了 「FreeFileSync 免費資料夾(目錄)比對同步軟體」推薦 FreeFileSync 這套免費的檔案同步軟體。這一篇則是想要用 Windows 7/8內建的 robocopy命令列指令來達成同樣的資料夾(目錄)同步比對工作。
工具:
編輯同步批次檔autosync.bat :
robocopy 指令參數說明:
設定開機自動執行批次檔:
如果您想要每次電腦開機後,會自動執行剛才完成的同步動作設定,那就必須在Windows的「啟動」資料夾中設定批次檔的執行捷徑或直接將批次檔存在啟動資料夾中:
完成後,下次開機就能自動執行前面設定的同步工作囉~
#
工具:
- Windows 7/8 命令列 (cmd) 下的 robocopy 指令
- Windows 鍵 > cmd 開啟命令列視窗
- 命令列視窗模式下輸入 robocopy,應可看到下列訊息:
C:\Windows\system32>robocopy

---------------------------------------------------------------------
   ROBOCOPY     ::     Robust File Copy for Windows

---------------------------------------------------------------------

  已啟動 : Mon Jan 04 11:19:12 2016

       簡單使用方式 :: ROBOCOPY source destination /MIR

             source :: 來源目錄 (drive:\path 或 \\server\share\path)。
        destination :: 目的地目錄  (drive:\path 或 \\server\share\path)。
               /MIR :: 鏡像完整的樹狀目錄。

    如需有關使用方式的詳細資訊,請執行 ROBOCOPY /?


****  /MIR 可以刪除檔案以及複製檔案!
編輯同步批次檔autosync.bat :
robocopy C:\來源資料夾1\ D:\目標資料夾1\ /MIR /XO /E /R:2

robocopy C:\我的資料夾\ D:\備份資料夾\ /MIR /XO /E /R:2
編輯完成後,記得存檔喔~
robocopy 指令參數說明:
- /MIR :: 鏡像完整的樹狀目錄。
- /XO :: 排除較舊的檔案。 (目標資料夾中若有相同檔案就不再複製)
- /E :: 複製子目錄,包括空的子目錄。
- /R:n :: 失敗複本的重試次數: 預設值是 1 百萬次。
設定開機自動執行批次檔:
如果您想要每次電腦開機後,會自動執行剛才完成的同步動作設定,那就必須在Windows的「啟動」資料夾中設定批次檔的執行捷徑或直接將批次檔存在啟動資料夾中:
- 開啟Windows的「啟動」資料夾
%USERPROFILE%\AppData\Roaming\Microsoft\Windows\Start Menu\Programs\Startup - 在資料夾內新增剛才儲存的 autosync.bat 檔案的捷徑
 |
| Windows 按鈕 > 執行(R) |
 |
| 開啟(O) : %USERPROFILE%\AppData\Roaming\Microsoft\Windows\Start Menu\Programs\Startup |
 |
| 新增批次檔的捷徑或將批次檔儲存於啟動資料夾中 |
完成後,下次開機就能自動執行前面設定的同步工作囉~
#
2015年12月29日 星期二
Python 基本爬蟲程式 + jieba 中文分詞 範例 - 以 Google 新聞為例
目標:
前篇(Python 基本爬蟲程式 (crawler) 範例 - 以 Google 新聞為例)我們先利用簡單爬蟲程式來擷取Google 新聞-焦點新聞的標題和新聞連結。現在我們就接著利用 jieba 這套中文分詞程式嘗試將截取回來的標題文字進行中文分詞。
工具:
- Python Package - jieba
export http_proxy=http://proxy.hinet.net:80
export https_proxy=http://proxy.hinet.net:80

pip install jieba
程式:
# coding=utf-8
# encoding=utf-8

import requests
from bs4 import BeautifulSoup
import jieba

res = requests.get("https://news.google.com")
soup = BeautifulSoup(res.text)

count = 1

for item in soup.select(".esc-body"):
    print '======[',count,']========='
    news_title = item.select(".esc-lead-article-title")[0].text
    news_url = item.select(".esc-lead-article-title")[0].find('a')['href']
    print("News Title: "+news_title)
    print("News Url: "+news_url)

    # 載入使用者自建詞庫
    jieba.load_userdict("userdict.txt")
    # 對 news_title 進行中文分詞
    print ''
    print '  -------進行中文分詞-------'
    words = jieba.cut(news_title, cut_all=True)
    print("  Full Mode: " + "/ ".join(words))
    words = jieba.cut(news_title, cut_all=False)
    print("  Default Mode: " + "/ ".join(words))
    words = jieba.cut_for_search(news_title)
    print("  Search Engine Mode: " + ", ".join(words))
    print ''

    count += 1
執行結果:
======[ 41 ]=========

...

News Title: 包塑膠袋泡冰水男順利接回斷指
News Url: http://udn.com/news/story/7266/1406918-%E5%8C%85%E5%A1%91%E8%86%A0%E8%A2%8B%E6%B3%A1%E5%86%B0%E6%B0%B4-%E7%94%B7%E9%A0%86%E5%88%A9%E6%8E%A5%E5%9B%9E%E6%96%B7%E6%8C%87

  -------進行中文分詞-------
  Full Mode: 包/ 塑/ 膠/ 袋/ 泡/ 冰水/ 男/ 順/ 利/ 接回/ 斷/ 指
  Default Mode: 包塑/ 膠袋/ 泡/ 冰水/ 男順利接/ 回斷/ 指
  Search Engine Mode: 包塑, 膠袋, 泡, 冰水, 男順利接, 回斷, 指

======[ 42 ]=========
News Title: 與林口長庚同等級土城醫院開工
News Url: http://www.chinatimes.com/newspapers/20151229000446-260106

  -------進行中文分詞-------
  Full Mode: 與/ 林口/ 長/ 庚/ 同等/ 級/ 土城/ 醫/ 院/ 開/ 工
  Default Mode: 與/ 林口/ 長/ 庚/ 同等/ 級/ 土城/ 醫院/ 開工
  Search Engine Mode: 與, 林口, 長, 庚, 同等, 級, 土城, 醫院, 開工
參考資料:
- GitHub - jieba
- Speaker Dock - Jieba 結巴中文斷詞
- 下載使用者自建詞庫 userdict.txt (補充自小麥注音輸入法詞庫)
2015年12月17日 星期四
R - 簡單洗牌函數
> # 洗牌 to shuffle cards
> to_shuffle_cards <- function() {
+ rep_times = 1
+ cards <- matrix(nrow=4, sample(rep(1:52,times=rep_times), 52, replace=FALSE))
+ rownames(cards) <- c("player1","player2","player3","player4")
+ cards <- as.table(cards)
+ return(cards)
+ }
> x <- to_shuffle_cards()
> y <- to_shuffle_cards()
> x
A B C D E F G H I J K L M
player1 4 34 19 45 3 42 27 24 37 40 51 22 5
player2 35 16 17 38 1 30 13 47 33 26 15 44 52
player3 7 39 41 10 36 23 48 14 20 31 25 6 46
player4 12 49 8 21 18 43 2 50 28 9 32 29 11
> y
A B C D E F G H I J K L M
player1 31 17 15 37 5 18 43 3 51 13 9 38 19
player2 20 27 10 45 30 32 7 48 47 11 2 25 42
player3 41 34 29 50 8 4 28 35 23 44 1 12 52
player4 6 49 16 24 40 14 36 21 26 33 46 22 39
> to_shuffle_cards <- function() {
+ rep_times = 1
+ cards <- matrix(nrow=4, sample(rep(1:52,times=rep_times), 52, replace=FALSE))
+ rownames(cards) <- c("player1","player2","player3","player4")
+ cards <- as.table(cards)
+ return(cards)
+ }
> x <- to_shuffle_cards()
> y <- to_shuffle_cards()
> x
A B C D E F G H I J K L M
player1 4 34 19 45 3 42 27 24 37 40 51 22 5
player2 35 16 17 38 1 30 13 47 33 26 15 44 52
player3 7 39 41 10 36 23 48 14 20 31 25 6 46
player4 12 49 8 21 18 43 2 50 28 9 32 29 11
> y
A B C D E F G H I J K L M
player1 31 17 15 37 5 18 43 3 51 13 9 38 19
player2 20 27 10 45 30 32 7 48 47 11 2 25 42
player3 41 34 29 50 8 4 28 35 23 44 1 12 52
player4 6 49 16 24 40 14 36 21 26 33 46 22 39
#
2015年6月13日 星期六
Bash Shell - 隨機產生小於10000的數字
給自己的備忘錄:
範例一:每隔5秒鐘持續執行一次,不會停止
範例一:每隔5秒鐘持續執行一次,不會停止
while (true);
do
n=$RANDOM;
echo $(( n %= 10000));
sleep 5;
done
範例二:每隔3秒鐘執行一次,總共執行迴圈5次
for i in {1..5};
do
n=$RANDOM;
echo $(( n %= 10000));
sleep 3;
done
#
2015年4月17日 星期五
Mac OS X / *nix 找出目錄中檔案大小為0的檔案
給自己的備忘錄:
找出檔案 size = 0 :
> find $dirpath -type f -size 0 -exec ls {} \;
找出檔案 size > 100K
> find $dirpath -type f -size +100k -exec ls {} \;
找出檔案 size > 1M
> find $dirpath -type f -size +1M -exec ls {} \;
找出檔案 size > 1000 Bytes
> find $dirpath -type f -size +1000c -exec ls {} \;
#
找出檔案 size = 0 :
> find $dirpath -type f -size 0 -exec ls {} \;
找出檔案 size > 100K
> find $dirpath -type f -size +100k -exec ls {} \;
找出檔案 size > 1M
> find $dirpath -type f -size +1M -exec ls {} \;
找出檔案 size > 1000 Bytes
> find $dirpath -type f -size +1000c -exec ls {} \;
#
2014年9月14日 星期日
替 Blogger.com 文章加上程式碼區塊(codeblock)和執行結果區塊(shellblock)
選擇 範本>編輯HTML ,在HTML程式碼中找到CSS區塊,最後新增.post .codeblock和.shellblock的CSS程式碼如下:
另外在<head>和</head>之間,加上
記得要「儲存範本」喔!
之後在寫部落格文章時,在HTML模式底下寫
<style type='text/css'>    ...

    .post .codeblock {
       display: block; /* fixes a strange ie margin bug */
       font-family: Courier New;
       font-size: 10pt;
       overflow:auto;
       background: #f7f7f7 url(https://blogger.googleusercontent.com/img/b/R29vZ2xl/AVvXsEh5yQoXazjZmzOBl-CuDBezK44UwWVLs8GNNigHQmyKSv8EvcXCEtSlMQAPUeXgo0wlKey6nO9VbGG4VF-b4NxEJivH5avNfjYagrnLNQcx8l4TL9AbxT6JU3PUUKBgNzbG9WHP8WMGRmcX/s1600/Code_BG.gif) left top repeat-y;
       border: 1px solid #ccc;
       padding: 10px 10px 10px 21px;
       max-height:1000px;
       line-height: 1.2em;
    }

    .post .shellblock {
       display: block; /* fixes a strange ie margin bug */
       font-family: Courier New;
       font-size: 10pt;
       overflow:auto;
       color: #00ff00;
       background: #000000;
       border: 1px solid #ccc;
       padding: 10px 10px 10px 21px;
       max-height:1000px;
       line-height: 1.2em;
    }
</style>
另外在<head>和</head>之間,加上
<script src="//google-code-prettify.googlecode.com/svn/loader/run_prettify.js"></script>
記得要「儲存範本」喔!
之後在寫部落格文章時,在HTML模式底下寫
<pre class="codeblock prettyprint">
public class first {
    public static void main (String[] args) {
        System.out.println("Hello, my first java!");
    }
}
</pre>
就會出現下列結果囉:
public class first {
    public static void main (String[] args) {
        System.out.println("Hello, my first java!");
    }
}
如果寫成
<pre class="shellblock">
  執行結果
  ...
</pre>
結果就會變成
  執行結果
  ...
#
Java Multithread Examples
Java MultiTread 程式的基本結構:
import java.util.*;

class firstThread implements Runnable {
   private Thread t;
   private String threadName;

   firstThread( String name) {
      threadName = name;
      ...
   }

   public void run() {
      ...
   }

   public void start() {
      if (t==null) {
        t = new Thread (this, threadName);
        t.start();
      }
   }
} // end of class firstThread

public class first {

 public static void main(String []args) {
    try {
       ...
    } catch (Exception e) {
       System.out.println(e);
    }
 } // end of main

} // end of class first
編輯 first.java 程式碼範例如下:
import java.util.*;

class firstThread implements Runnable {
   private Thread t;
   private String threadName;

   firstThread( String name) {
      threadName = name;
      System.out.println("Creating " + threadName);
   }

   public void run() {
      long start = System.currentTimeMillis();
      System.out.println("Running " + threadName);
      try {
         for (int i=0; i<=10; i++) {
            Random ran = new Random();
            int j = ran.nextInt(1000) + 1;
            Thread.sleep( j );
            System.out.println(" Thread " + threadName + " : round " + i + " sleep " + j);
         }
         long end = System.currentTimeMillis();
         long diff = end - start;
         System.out.println("Difference of " + threadName + " is : " + diff);
      } catch (Exception e) {
         System.out.println("Thread " + threadName + " : " + e);
      }
      System.out.println("Thread " + threadName + " exiting.");
   }

   public void start() {
      System.out.println("Starting " + threadName);
      if (t==null) {
         t = new Thread (this, threadName);
         t.start();
      }
   }
} // end of class firstThread

public class first {
   public static void main(String []args) {
      try {
         firstThread r1 = new firstThread("Thread-1");
         r1.start();

         firstThread r2 = new firstThread("Thread-2");
         r2.start();

         firstThread r3 = new firstThread("Thread-3");
         r3.start();
      } catch (Exception e) {
         System.out.println(e);
      }
   } // end of main
} // end of class first
編譯 first.java
$ javac first.java執行 java first,因為 MultiThread 和 Random sleep 的影響,結果可能和下列範例有些不同。
$ java first

Creating Thread-1
Starting Thread-1
Creating Thread-2
Starting Thread-2
Running Thread-1
Creating Thread-3
Starting Thread-3
Running Thread-2
Running Thread-3
 Thread Thread-3 : round 0 sleep 660
 Thread Thread-2 : round 0 sleep 730
 Thread Thread-1 : round 0 sleep 837
 Thread Thread-2 : round 1 sleep 213
 Thread Thread-2 : round 2 sleep 363
 Thread Thread-1 : round 1 sleep 794
 Thread Thread-3 : round 1 sleep 995
 Thread Thread-1 : round 2 sleep 112
 Thread Thread-1 : round 3 sleep 158
 Thread Thread-2 : round 3 sleep 649
 Thread Thread-3 : round 2 sleep 578
 Thread Thread-1 : round 4 sleep 427
 Thread Thread-2 : round 4 sleep 893
 Thread Thread-2 : round 5 sleep 8
 Thread Thread-3 : round 3 sleep 625
 Thread Thread-2 : round 6 sleep 159
 Thread Thread-3 : round 4 sleep 260
 Thread Thread-1 : round 5 sleep 879
 Thread Thread-2 : round 7 sleep 667
 Thread Thread-2 : round 8 sleep 58
 Thread Thread-3 : round 5 sleep 824
 Thread Thread-2 : round 9 sleep 392
 Thread Thread-2 : round 10 sleep 2
Difference of Thread-2 is : 4146
Thread Thread-2 exiting.
 Thread Thread-1 : round 6 sleep 985
 Thread Thread-3 : round 6 sleep 667
 Thread Thread-1 : round 7 sleep 839
 Thread Thread-3 : round 7 sleep 665
 Thread Thread-1 : round 8 sleep 354
 Thread Thread-1 : round 9 sleep 96
 Thread Thread-1 : round 10 sleep 171
Difference of Thread-1 is : 5666
Thread Thread-1 exiting.
 Thread Thread-3 : round 8 sleep 559
 Thread Thread-3 : round 9 sleep 61
 Thread Thread-3 : round 10 sleep 201
Difference of Thread-3 is : 6108
Thread Thread-3 exiting.
2014年9月7日 星期日
亂,也要找對方法 - bash shell 隨機亂數產生方法
# random.sh

#!/bin/bash
# 想要產生 1..500之間的亂數
n=500
echo $n
# 執行隨機亂數 500 x 100 = 50000 回合
for ((i=1; i<=50000; i++))
do
# 顯示是第幾回合
echo $i
# 方法1
RANDOM=`date +%s`
echo $(( RANDOM % n + 1 )) >> 1.list
# 方法2
RANDOM=$$
echo $(( RANDOM % n + 1 )) >> 2.list
# 方法3
# 目前相對好的bash隨機亂數方法, 隨機結果相對比較平衡
echo $(( $(od -An -N3 -i /dev/random) % n + 1)) >> 3.list
done
----------
以R來檢驗亂數產生結果
方法1產生結果:
> d1<-read.table('1.list', header = F)
> d1=as.martix(d1)
> summary(d1)
V1
Min. : 1.0
1st Qu.:136.0
Median :256.0
Mean :234.9
3rd Qu.:316.0
Max. :500.0
> hist(d1)

方法2產生結果:
> summary(d2)
V1
Min. : 0.0
1st Qu.:263.0
Median :263.0
Mean :258.7
3rd Qu.:321.0
Max. :472.0
> hist(d2)

> summary(d3)
V1
Min. : 0
1st Qu.:125
Median :250
Mean :250
3rd Qu.:375
Max. :500
> hist(d3)
ps. 其實上述範例產生出來的亂數範圍有點小錯 XD
2013年11月29日 星期五
Mac OS X 安裝及使用 Homebrew
ubuntu apt 用習慣的朋友,應該也能很快適應 Homebrew for Mac OS X的。
安裝步驟參考官網及實際經驗筆記如下:
> ruby -e "$(curl -fsSL https://raw.github.com/mxcl/homebrew/go/install)"
延伸閱讀:
安裝步驟參考官網及實際經驗筆記如下:
> ruby -e "$(curl -fsSL https://raw.github.com/mxcl/homebrew/go/install)"
> brew update
接著就能安裝自己想要的 UNIX Packages,如:wget, curl, lynx ...
> brew install wget
> brew install lynx
查詢經安裝的套件列表
> brew list
或是想要移除已經安裝的套件
> brew uninstall wget
自動更新已經安裝的套件
> brew upgrade wget
其他功能可以藉由Help看指令參數及用法
> brew help
延伸閱讀:
#
2013年11月14日 星期四
安裝 elasticsearch 與 python client for elasticsearch
安裝 elasticsearch
官網下載 http://www.elasticsearch.org/download/
解開壓縮檔後,至bin目錄下即可執行啟動 elasticsearch
> elasticsearch.bat 或 > elasticsearch.sh
安裝 urllib3 package
> easy_install urllib3 或 > pip install urllib3
或至官網下載https://pypi.python.org/pypi/elasticsearch
接著利用下列程式測試一下...
安裝 python client for elasticsearch package
接著利用下列程式 estest.py 測試一下...
測試成功結果 (timestamp依照系統時間而不同):
官網下載 http://www.elasticsearch.org/download/
解開壓縮檔後,至bin目錄下即可執行啟動 elasticsearch
> elasticsearch.bat 或 > elasticsearch.sh
安裝 urllib3 package
> easy_install urllib3 或 > pip install urllib3
或至官網下載https://pypi.python.org/pypi/elasticsearch
接著利用下列程式測試一下...
# -*- coding: utf-8 -*-

import urllib3
http = urllib3.proxy_from_url('http://proxy.hinet.net/')
r = http.request('GET', 'http://tekibrain.blogspot.com/')

print r.status # 正常的話應該會印出 '200',網站傳回 HTTP Return code '200'
print r.data # 印出網頁原始碼資料
安裝 python client for elasticsearch package
> easy_install elasticsearch
或者
> pip install elasticsearch

或至官網下載 https://pypi.python.org/pypi/urllib3
接著利用下列程式 estest.py 測試一下...
# -*- coding: utf-8 -*-

from datetime import datetime
from elasticsearch import Elasticsearch

# 預設連線至 ElasticSearch Server Port 9200,  localhost:9200
es = Elasticsearch()

# 加入資料進行索引, 自己設定  id = 1
# http://localhost:9200/social/tweet/1
setdata = es.index(index="social", doc_type="tweet", id=1, body={"content": "大家好","user":{"name":"老王","id":670085},"tags":["demo","test"], "timestamp": datetime.now()})
print 'set data => '
print setdata
setdata = es.index(index="social", doc_type="tweet", id=2, body={"content": "大家好2","user":{"name":"小王","id":670086},"tags":["demo","test2"], "timestamp": datetime.now()})
print 'set data => '
print setdata


#  取得 id=1 資料
getdata = es.get(index="social", doc_type="tweet", id=1)['_source']
print '-------------------------'
print 'get data <= '

es.indices.refresh(index="social")
# Search:
qdoc = {
 "query": {
  "match" : {
   "tags" : "demo"
  }
 }
}
getdata = es.search(index="social", body=qdoc)
print 'get data <= '
#print type(getdata)
print("Got %d Hits:" % getdata['hits']['total'])
for hit in getdata['hits']['hits']:
    print("%(content)s %(user)s: %(tags)s" % hit["_source"])
測試成功結果 (timestamp依照系統時間而不同):
> python estest.py
set data =>
{u'_type': u'tweet', u'_id': u'1', u'ok': True, u'_version': 44, u'_index': u'social'}
set data =>
{u'_type': u'tweet', u'_id': u'2', u'ok': True, u'_version': 42, u'_index': u'social'}
-------------------------
get data <=
get data <=
Got 2 Hits:
大家好2 {u'name': u'\u5c0f\u738b', u'id': 670086}: [u'demo', u'test2']
大家好 {u'name': u'\u8001\u738b', u'id': 670085}: [u'demo', u'test']
#
2013年11月4日 星期一
Python 2.7 進行 datetime 加減(timedalta)及設定輸出格式(strftime)
- 設定 someday = datetime.date(2013,10,28)
- datetime.timedelta(days = 1) 用於計算 datetime 時間增減(本例:以1天為單位)
- 可利用 strftime("%Y%m%d) datetime 控制輸出格式
vi test.py
import time
import datetime

someday = datetime.date(2014,9,20)

while (someday <= datetime.date.today()) :
    # print out with date format : YYYYMMDD, example : 20140920
    print str(someday.strftime("%Y%m%d"))
    someday += datetime.timedelta(days = 1)

print "================="

someday = datetime.date.today()

while (someday >= datetime.date(2014,9,15)) :
    # print out with date format : YYYYMMDD, example : 2014-09-20
    print str(someday.strftime("%Y-%m-%d"))
    # minus, timedelta(days = 1)
    someday -= datetime.timedelta(days = 1)

print "================="

someday = datetime.date.today()

while (someday >= datetime.date(2014,9,15)) :
    # print out with date format : YYYYMMDD, example : 2014/09/20
    print str(someday.strftime("%Y/%m/%d"))
    # add, timedelta(days = -1)
    someday += datetime.timedelta(days = -1)
執行結果:
$ python test.py
20140920
20140921
20140922
=================
2014-09-22
2014-09-21
2014-09-20
2014-09-19
2014-09-18
2014-09-17
2014-09-16
2014-09-15
=================
2014/09/22
2014/09/21
2014/09/20
2014/09/19
2014/09/18
2014/09/17
2014/09/16
2014/09/15
延伸閱讀:datetime - Basic date and time types (python.org)
#
2013年10月27日 星期日
Mac OS X USB裝置樹(裝置列表) : alias lsusb="system_profiler SPUSBDataType"
Linux 環境下 lsusb 指令可以快速提供電腦上 USB 裝置的清單列表。
Mac OS X 上雖無 lsusb 指令,但其實有對應的功能可以使用。
點選 螢幕左上角的蘋果icon > 關於這台Mac > 更多資訊... > 系統報告 > USB
就能顯示出目前系統的USB裝置樹。
喜歡在終端機 (Terminal)手動下指令的話,可以執行 > system_profiler SPUSBDataType 指令。也能看到所有USB裝置列表。
如果您真的執意想要執行 lsusb 指令的話,不妨就在 ~/.bash_profile 中利用alias指令將 system_profiler SPUSBDataType 指令 alias 成 lsusb 。
Mac OS X 上雖無 lsusb 指令,但其實有對應的功能可以使用。
點選 螢幕左上角的蘋果icon > 關於這台Mac > 更多資訊... > 系統報告 > USB
就能顯示出目前系統的USB裝置樹。
 |
| USB 裝置樹 |
喜歡在終端機 (Terminal)手動下指令的話,可以執行 > system_profiler SPUSBDataType 指令。也能看到所有USB裝置列表。
 |
| 執行 system_profiler SPUSBDataType |
alias lsusb="system_profiler SPUSBDataType"
- 開啟編輯 ~/.bash_profile 設定檔加上上面 alias 指令存檔後。
- 執行 > source ~/.bash_profile 。
接著就能在終端機下文字指令 > lsusb 來看 USB 裝置清單囉。
#
訂閱:
文章 (Atom)